Showing posts with label Farmer's Market. Show all posts

Tuesday, June 6, 2017

To market we go...

Hi, all!  I'm a week behind, but was so excited to share with you a little peek from our first trip of the season to the Collingswood Farmer's Market over Memorial Day weekend.  Of course this included a MUCH-REQUESTED quesadilla and guacamole from Tortilla Press....


...and a surprise run-in with the town's May Days, where we had lots of window shopping and face paining fun.

And along with all of that fun, of course there was lots of jewels from the market.  And of course the one that shines brightest at this moment is the plentiful asparagus...
And since there's such an abundance to go around at this moment, I have to share one of my favorite recipes that I make EVERY year during asparagus season with you guys.  ALSO I'm getting to share this recipe with the lovely Collingswood Blogger project again this year...so excited!

So here goes...

Roasted Asparagus & Balsamic Brown Butter with Pasta 
This was one of the first recipes I ever pinned to my Pinterest board, and one I actually moved to my "Pinned & Made" folder early on (don't even get me started on the ratio of pinned to madeJ) hahahahhahaa)  The recipe sounds SUPER FANCY, but is actually sooooooooooooo easy!  

First up is the roasted asparagus (at 350 for 30 minutes)...

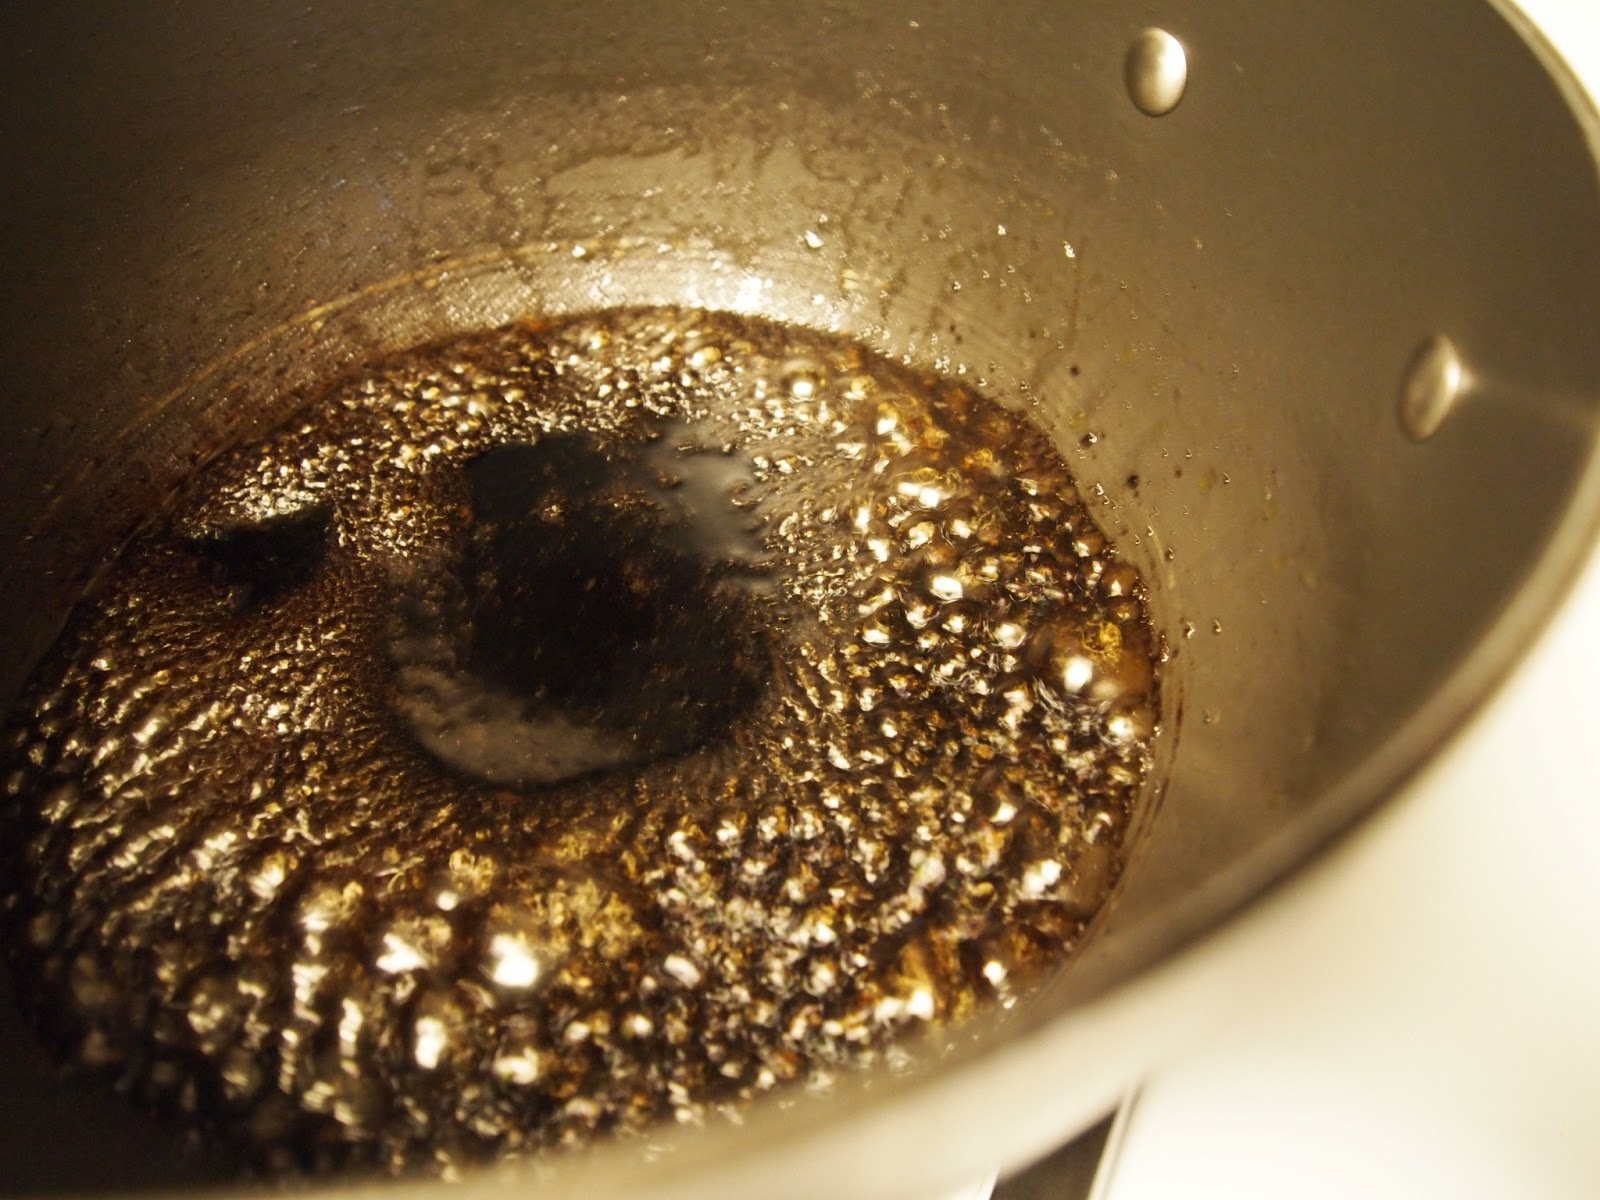
Then I boiled some pasta, and while I had it draining in the sink, I added the 1/2 cup of balsamic RIGHT to the spaghetti pot in an effort to do ONE LESS DISH with tonight's dinner!  hahahahahhaa... 

After you let the balsamic boil down for about 5 minutes, you add in a 1/2 teaspoon of brown sugar and a few tablespoons of butter and allow that to melt all together... 

Once the butter is melted, toss in the pasta, asparagus & 1/3 cup of grated cheese and MIX, MIX, MIX! 

How easy is THAT???  And I'm tellin ya, the balsamic/butter sauce is NOT to be believed!!!  Boiling the balsamic (and the help of the pinch of brown sugar) sweetens it up, while the butter makes it lovely & luscious.  And we swapped penne for angel hair in the recipe, so you occasionally get a nice twirl of roasted asparagus mixed in.  DELISH!


Hope you have fun trying this one out in our green days of the season😍


Connect with me:

On Instagram  
Through Email
On Youtube
Comment below

As always...thanks for reading!

Wednesday, September 7, 2016

A tale of two peppers...

Hey guys!  I know it's been a minute since I've shared a recipe with you for the Collingswood Farmer's Market Bloggers, so today I'm bringing you a DOUBLE whammy. 

But first?  A photo of Katie, who lingered by this mural next to the market for a good half hour while we noshed on Tortilla Press Quesadillas.  She just couldn't get over all of the animals hidden in the tree branches, and I couldn't get over watching her love it:)  #Momlife.


And of course, we have our produce picture...
...and this STILL doesn't tell the tale of how many beautiful and fresh veggies are just BURSTING at the seams at every turn at the market.  TIS THE SEASON for ALL the beauties.

And one big theme this week:  Peppers.  Peppers ALL DAY.  "You get a pepper!  And YOU get a pepper!"

OK, I'll settle down.

BUT not before sharing 2 recipes with you today.  The first is for one of my favorite ways to 'healthy up' one of those awesome decadent treats:  Pepper nachos!
Swoooooonnnnn...nachos minus the cards and + lots of vitamins & minerals?  Done and DONE.

You can use any peppers you want for this recipe, but my favorite is to use those ADORABLE baby peppers to make bite-size 'nachos'...
Slice the peppers in half, remove the seeds and bake the peppers for about 10-20 minutes on 350 just to soften them up a bit.

While the peppers are cooking up a bit, it's time to get your fillings together.  For this recipe, I poached some chicken breasts until cooked, give em a shred and sprinkle with taco seasoning.  (you could also use ground meat/turkey, black beans, whatever sounds good to you)

Next, pile the chicken (or your favorite filling) into the peppers...

Top with cheese (I used monterey jack & cotija) and green onions and bake until the cheese is melty and delicious...

Top with lettuce, tomatoes, guacamole or any of your favorite nacho topping and you've got a quick, delicious and HEALTHY way to serve nachos ANY day of the week!

Baby Pepper Nachos

Ingredients:
  • 1 bushel of mini peppers, seeded and sliced
  • Poached chicken (or your favorite nacho filling)
  • Cheese
  • Green Onions

  1. Place pepper halves on a foil-lined baking sheet and bake for about 10-20 minutes at 350 degrees until warmed through.
  2. Fill with chicken (or your favorite filling) and top with cheese and green onions.
  3. Bake until cheese is melty.  Top with lettuce, tomatoes, etc.
  4. Devour!


And from the itty-bitty peppers to these beauties...

...I put them to work to make a great meal for these grilling days:  Grilled Pepper Pizza...

I quickly lopped off the tops of the peppers and deseeded them before slicing em in quarters and giving em a quick whirl in my food processor, creating a flavorful 'sauce' in mere minutes.  I also added a couple garlic cloves because, well, WHY NOT?  But feel free to omit if that's not your jam.

While I worked on the pepper, I had the crust workin on that grill.  The way we make grilled pizza is to stretch out the dough and toss on one side directly onto the grill.  When the crust is done, it will easily release from the grates.  Flip the cooked side up.... 

...and start to pile on the goods.  For this pepper pizza, we added the pepper & garlic 'sauce'... 

...we also added some sliced onions (to really extenuate how AWESOME we were going to smell later;) and lots of mozzarella...
...toss back on the grill until the underside is cooked and the cheese is melted.

I mean...
Can you really argue with GRILL kissed pizza laced with fresh flavors?  It's one of the perfect ways to wind down this summer season.


Grilled Pepper Pizza

Ingredients:
  • Long peppers, deseeded and quartered
  • 3 cloves of garlic
  • Pizza dough
  • Onion
  • Mozzarella Cheese
  1. Preheat grill and roll out the dough.  Once the grill is hot, place dough directly on grates.  It will easily release once the dough is cooked on one side.
  2. While the dough is cooking, toss the peppers & garlic into the food processor and whirl until it is a sauce consistency.
  3. Take dough off the grill and flip so the cooked side is on top.  Top with pepper sauce, sliced onions and mozzarella cheese.
  4. Place back on the grill and cook until the underside is cooked and the cheese is melty.
  5. ENJOY!

Hope you liked these recipes.  I'll have more to share with you next week since, this time of year, I am BURSTING with fresh, healthy veggie recipes.  Have a great one!


Connect with me:

On Instagram  
Through Email
On Youtube
Comment below

As always...thanks for reading!

Wednesday, June 8, 2016

Strawberry season...

Well, tis the season for these beauties...
So can I tell you something?  I always thought strawberries were all fine & dandy, wading my way through your standard supermarket strawberry all my days.  But I had no idea what I was missing until the first time I tried a strawberry nearly straight from the vine from the Collingswood Farmer's Market quite a few summers ago...
Gems, I tell ya!  Absolute GEMS!  There is absolutely NOTHING like FRESH berries.  Those bland, flavorless supermarket varieties don't even hold a candle to these sweet, juicy beauties.  And since it's the height of the season, I just HAVE to share with you one of my VERYFAVORITE sweet & savory recipes:


STRAWBERRY CHICKEN!
(and cheese grits + pepper & corn saute on the side to round out the meal if you'd likeJ)

I know, I KNOW...don't look at me like that!  This dish is allllll the sweetness of the strawberries combined with salty toppings plus a kiss from the grill.  AKA- a SUMMER 101 dish that your family & guests (this is SOOOO pretty enough for company!) will never expect.  You're gonna LOVE it.

You just heat a cup of those beautiful strawberries in a saucepan with 1/2 cup of sugar, 1/2 cup of sherry vinegar (or sherry wine) and a dash of cardamom.  Mash the berries, give everything a swirl to combine the ingredients and bring the liquid to a boil... 

Once the mixture comes to a boil, lower the heat and allow it to simmer for 20 minutes or so, stirring occasionally...

You know it's done once the strawberries become thick and syrupy.  You can strain the mixture, but I like to leave it as is and keep the little strawberry chunks hidden in the syrup... 

While the strawberry sauce is cooking, you can toss the chicken on the grill with a little salt & pepper until cooked through.  Meanwhile, mix the topping of gorgonzola cheese, a little thyme & some diced prosciutto (or crumbled bacon even!)  Once the chicken is cooked, plate it on top of the strawberry sauce and cap it off with the gorgonzola/prosciutto/thyme mix.
Just divine!  Get ready to be pleasantly surprised.

Strawberry Chicken with Gorgonzola
Serves 4
  • 1 pound chicken, pounded flat
  • 1 cup strawberries
  • 1/2 cup sugar
  • 1/2 cup sherry vinegar (or wine)
  • Dash of cardamom
  • 1 cup gorgonzola cheese crumbles
  • 1 1/2 teaspoons dried thyme
  • 3 slices prosciutto, diced
  1. Combine strawberries, sugar & sherry in a small saucepan and bring to a boil over medium high heat.  Once the mixture comes to a boil, turn the heat to low and allow to simmer for to until thickened (about 20 minutes), stirring occasionally.
  2. While the strawberry sauce is cooking, sprinkle the chicken with a little salt & pepper and cook on the grill (or stovetop) until cooked through.
  3. Combine cheese, thyme & diced prosciutto in a small bowl.
  4. Pour a little strawberry sauce on a plate and top with chicken and cover with cheese & prosciutto mix.


Connect with me:

On Instagram  
Through Email
On Youtube
Comment below

As always...thanks for reading!

Wednesday, May 11, 2016

Quick Spring pea ravioli with brown butter garlic sauce...

So this weekend marked the opening of the Collingswood Farmer's Market...which I've written about a time or two or twenty on my blog over the years (see more at the bottom of this post)J

Going through the old posts on the market is like a time capsule!  Really didn't anticipate in that first 2010 post that in 2016 we'd be bringing our TWO CHILDREN to the market with us.  I mean...what just happened??  

ANYWAY...so back to the exciting news that I & a few other awesome JERSEY bloggers are joining forces with the Collingswood Farmers Market to highlight fresh produce and develop recipes based on the seasonal produce de jour of the moment.  And there's nothing I heart more than eating in SEASON....weeeeeeeeeeee!  So for my debut post, I thought I'd whip up a little recipe based on your favorite little green veggie:  SPRING PEAS.

Make that:  Quick spring pea ravioli in brown butter garlic sauce...
Sounds FANCY, right??  Ya wanna know the kicker??  These couldn't be easier...courtesy of one little 'cheat' ingredient.  But shhhhh...don't tell anyone, so they can think you made these from scratch.  And you know I have a heart for 'from scratch' ravioli...but sometimes ya just gotta move it along in life and get that dinner on the table in under 30 minutes, ya know what I mean?  Even better:  you can make the ravioli ahead and freeze them so you can have dinner on the table in under 15 minutes...weeeeeeeeeeeeeeeeeeeeee!

We'll start out with those beautiful green peas, which need to be steamed over boiling water for 3-4 minutes....

...and here's the TRULY hardest part of this recipe:  ya gotta let em cool for a little bit once they're cooked.  Seriously, that's the hardest part and the only reason this isn't an under 30 minute meal from the jump.

Once the peas are cool, ya toss em in a food processor or blender with these other luscious ingredients...

...and puree until it looks like THIS: 
I kinda liked the idea of skipping the usual ricotta filling here.  Gives more chance for the PEAS to shine through, ya know?


And then it's time to break out the magic ingredient for QUICK & easy ravioli...
I know, I know and Grandmom forgive me, but they WORK for raviolis in under an hour.  Sometimes ya just gotta take the shortcut, give yourself a break and make life EASY.

Then it's time to line up the usual suspects:  A cookie sheet, peas, wonton wrappers + a small bowl of water... 

...and get to work. 


Add a rounded teaspoon of pea puree to each wrapper.

Add a little water around the edges... 


...and fold the wrapper around the peas...

...and pinch to seal. 

And then do that a bunch more times... 


I also like to give the center a little smooooosh to kinda spread out the peas.  More peas per bite, ya feel me? 


The 4-year old crowd can also totally get involved here...


You may end up with a few mish-mosh shaped ones, but who cares?J
You could pop the sealed ravioli on the cookie sheet into the freezer and freeze until solid before transferring to a freezer bag for later use OR you can just move on to the next step...

Next step: Time to cook the raviolis!  You COULD boil them but why worry about any of them breaking open?  This pan sear process is not only fool-proof, BUT you also get a little crispy texture to each rav' and how can you not love that bonus?  Add the ravioli (fresh or frozen) in a single layer directly to a pan that has been drizzled with a little oil & heated over medium heat...


Let them cook up for a few minutes (fresh took about 3-4 minutes, but the frozen ones take about 5-6 minutes) until the bottoms get a nice sear and a pretty crisp...

Once the ravs are crisp, it's time to add about 1/4-1/3 cup of water to the pan...

SIZZLE!

...and then pop a lid on the pan to help finish cooking up the ravioli.

After 3-4 minutes, pop the lid off and let the water finish evaporating.  And then:  THAT'S IT!  How easy is that??

And speaking of easy, while the ravioli are working, you can get to work on the QUICK brown butter garlic sauce. 
Heat the butter in the pan over medium-low heat...  


And allow the butter to melt until it begins to turn slightly golden brown...swoooooooon.  Give the pan the occasional swirl to check the color as you go.

Next, toss in the diced garlic cloves and allow to cook for another minute or two, until fragrant.  DO NOT let the garlic burn...or you'll have to make that 4 minute pan sauce all over againJ 

And then drizzzzzzllleeee that beautiful sauce over those browned & crisped ravioli.... 

AMIRIGHT?? 

How GORGEOUS is that green??  It doesn't even look real.  A true sign that those peas are picked at the peak of freshness.  Viva la spring peas. 

Spring Pea Ravioli in a Quick Brown Butter Garlic Sauce
Serves 4
  • 1 cup fresh peas
  • 1/2 cup grated cheese
  • 1/2 cup fresh basil
  • 1 teaspoon olive oil
  • 1 teaspoon lemon zest
  • salt & pepper, to taste
  • 1 package wonton wrappers
  • 4 tablespoons butter
  • 2-4 diced garlic cloves, to taste
  • lemon zest & Parmesan cheese, to taste
  1. Steam fresh peas over boiling water for 3-4 minutes.  Let cool.
  2. Puree peas, cheese, basil, olive oil, lemon zest and salt & pepper until blended.
  3. Lay out wonton wrappers on a cookie sheet.  Fill each wrapper with a rounded teaspoon of pea puree.  Edge each wrapper with a little water and seal wrapper around the puree.  Press fingers around edges to seal completely.  You can also freeze ravioli on cookie sheet and then transfer to a freezer bag once frozen solid.  They'll stay for several months.
  4. Heat a large skillet with a drizzle of oil over medium heat.  Add ravioli in a single layer to pan and allow the bottoms to crisp, 3-4 minutes.  (frozen will take about 5-6 minutes).
  5. Add 1/4-1/3 cup of water to the pan and cover.  Steam ravioli for about 3-4 minutes before removing the lid and allowing the water to finish evaporating.
  6. Top with garlic browned butter sauce (recipe below), and a sprinkle of Parmesan and lemon zest.
    1. Add butter to a small pan and let melt over medium-low heat for about 5 minutes, until golden. Give the pan a swirl ever so often to check the color.
    2. Once lightly golden, add in the garlic and allow to cook for 1-2 minutes or until fragrant.

Hope you like these are much as we do!  ENJOY!


Time capsule alert!  If you would like to see more posts on the Collingswood Market over the years, please check out the posts below!


Connect with me:
On Instagram  
Through Email
On Youtube
Comment below

As always...thanks for reading!
Related Posts Plugin for WordPress, Blogger...